Saturday, July 17, 2010

An Impulse Upgrade.

I've been using the Nikon D200 for the past 3 years as my primary tool for photography. It has served me well and the controls on the camera feel like second nature to me. Before taking a picture, I can switch the settings for ISO, Aperture, Shutter, etc. without even looking at the camera body. I was happy with my images and I had no plans of upgrading as I was waiting for Nikon to update their full-frame (FX Sensor) camera D700, (hopefully with 1080p video) before making the upgrade decision.

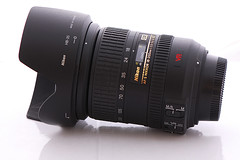
Jumping to a FX sensor  is going to be a big jump for me - as I have already invested in some quality lenses that are not compatible with the FX sensor (especially my lovely Nikkor 17-55 f2.8 and the Sigma 30mm f1.4). Besides buying the expensive camera body, I will also have to invest in some quality FX lenses. So that will not happen in the near future.

When I saw an ad for a used D300 body for a very good price, my antenna went up. I knew that the D300 was a step up from the D200. I was also aware of its improved ISO performance, but was not really sure about other enhancements compared to my current D200.

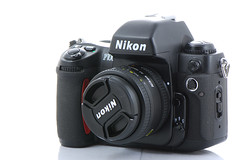
I pulled the trigger and purchased the body (It came bundled with the awesome 50mm f1.4 lens that I reviewed yesterday). Once I had the camera in my grubby hands, I decided to check its features compared to the D200. I was shocked!. This thing is an improvement over the D200 in almost every single area. DPReview has a nice side-by-side comparison of both D200 and D300. If I had analyzed these differences earlier, I am sure I would  have been tempted to upgrade much much earlier.

For me, these are the main differences:

1. ISO performance: I can shoot comfortably up to ISO 800 on the D200. It can go up to ISO 1600, but the pictures are not really usable. According to the data sheet, D300 allows me to shoot usable pictures up to ISO 1600, and it goes up to ISO 3200. So essentially, 1 whole stop of low-light improvement.

2. Auto-Focusing: D300 has 51 focus points for fast and accurate focusing, compared to the 11 focus points of D200.

3. Picture Size: D300 outputs 12.3 megapixels, compared to the 10.2 megapixels from the D200.

4. Dust Reduction System: D300 comes with a dust reduction system that automatically cleans the sensor using vibrations. D200 does not have such a system and dust removal requires careful manual cleaning that requires surgical skills.

5. Live View: I was surprised to learn that D300 has a live-view mode. Images can be composed using the LCD screen. D200 does not support live view.

Of course, there are many other differences but the above are what caught my fancy.

I've had the camera in my hands for only 2 days so I can't make a definitive judgement on how good it is compared to the D200. However, I will be shooting a lot in the coming days and I will post my detailed impressions on this camera. More importantly, I am going for a Himalayan trek next month so the camera will see some action there.

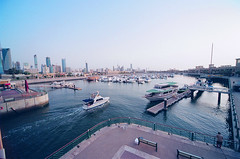
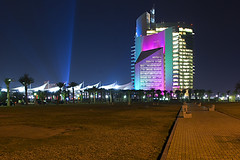
Since my main motivation of upgrading to D300 was its low-light capabilities, I decided to test this first. We had an outing last night at the beach with some friends. I took the new camera along with me to try some low-light shots. Here's one example shot at ISO 3200.

The place was almost dark and the only lights available for this picture were some sodium lights in a nearby basket-ball court about 50 meters away!!. This photo would be impossible to capture with the D200,

As expected, the image was quite noisy. I ran it through Neat Image Pro, and then applied some sharpening to make it usable. As you can see, the picture is decent and usable (albeit at a lower-resolution). But at the end of the day, it is usable and that is all that matters.

Here's a 100% crop of the original image (after running through Neat Image).

 Needless to say, I am terribly excited with the D300. Combined with the 50mm f1.4, it appears to be a deadly combination for low-light photography.

I still haven't decided what I will do with the D200. Perhaps use it as a backup body. It is, after all, still an awesome picture-taking machine.

Friday, July 16, 2010

The Superlative Nikon 50mm f/1.4D AF

Back in 2008, I sold off my trusty 50mm f/1.8D AF prime lens, with the idea that I will upgrade to the faster version of the lens. I even placed the order for it on Amazon. For some reason, Amazon had difficulty in fulfilling the order and kept postponing the delivery. I got fed up and cancelled the order and got the 105mm VR macro lens instead.

It was always in my schedule to eventually get the f/1.4 lens, and when Nikon introduced their AF-S version of the 50mm f/1.4, I thought that is the lens I should go for - but the steep price of $440 kept me at bay.

So when I saw an ad for a used 50mm f/1.4 for around $200, I was really really tempted even though I was not sure whether I could afford it. The decision became much easier when my wife urged me to go ahead and pick it up. All photographers should have a wife like mine.

The f/1.4 lens is 2/3rd stops brighter than the f/1.8 counterpart (i.e. 66% brighter). That makes a big difference when it comes to shooting in low-light situations.

The lens can be shot wide open without any worries (i.e. images appear sharp even when the lens is fully opened at f/1.4) unlike some lenses that need to be stopped down by a stop or two to get ideal results.

This picture of my daughter Erika was taken at f/1.4.

BTW, it is a ritual of mine to first take a picture of Erika with any new lens that I purchase.

The f/1.4 also makes it possible to completely blur out the background because of its extremely shallow DOF (depth-of-field). This is easy to see in the picture above. Erika was standing in a mall when I took the picture - but the whole background is completely blurred out.

The shallow DOF makes it very tricky to get the right focus. Even a slight mistake can render the picture out-of-focus so nailing the focus is extremely important when shooting wide open with this lens.

This picture really demonstrates the wafer-thin DOF of this lens. In this picture (shot wide open at f/1.4), just 2 or 3 lines of text are in focus, while the rest of the book (both front and rear) are out of focus. This can best be demonstrated by a 100% crop of the above image.

The area of focus is just a few millimeters. Imagine if you were shooting a portrait with this lens, it would be extremely important to get the camera to focus on the eyes of the model to ensure that the portrait appears sharp. Of course, you must keep in mind that the depth-of-field is also determined by the distance to the subject. Closer the subject (as in the case of Erika above), nailing the focus is paramount. However, when the subject moves further away, the depth-of-field increases. This means that if you are shooting a photo of a person who is 10 meters away, then focusing on any part of the body will be just fine.

Traditionally, on the film cameras, 50mm was considered the "normal" lens because the area of coverage provided by a 50mm is similar to the coverage that we get with our naked eyes. And this principle still applies if you have a FX sensor camera such as a Nikon D700, Nikon D3S, Nikon D3X, etc. However, when you mount this lens on a DX sensor camera such as the D90, D300s, the camera gives you a field-of-view of 75mm because these sensors have a crop factor of 1.5 (so 50mm x 1.5 = 75mm).

Since 75mm is an ideal range for portraits, this becomes an ideal portrait lens when mounted on DX sensor cameras.

Conclusion: If you love low-light photography or portrait photography, you owe it to yourself to invest in a 50mm f/1.4.

Monday, July 12, 2010

The Sigma 30mm f1.4


Perfect Breakfast
Originally uploaded by Cajie.
I was just checking my archives and realized that I never posted about this beautiful lens. I've had this lens for more than a year, but never really made good use of it.

However, I've recently become something of a health nut. I even started a separate blog to record my progress. Since the new blog is dedicated to fitness and healthy lifestyle, I find myself taking lots of food pictures. The Sigma (with its ultra-fast f1.4 aperture) allows amazing shallow depth-of-field, which, in turn, results in interesting pictures of food.

The Sigma 30mm f1.4 is a DX-optimized lens, which means it works on DX sensors such as D40, D80, D300 etc. It will not work correctly on full-frame sensors such as D700, D3, D3X etc.

It has a HSM (Hyper-Sonic Motor) on its body, which allows for fast and silent focusing. The HSM also allows the lens to be used on bodies that don't have a motor on the body such as the D40 and the D60.

It is not cheap. At around $450, it is something you purchase when you have lots of spare change or you need it for professional work.

Saturday, May 15, 2010

My next camera for travelling.

Ever since Olympus released their affordable PEN E-PL1, I've been meaning to pick it up as a travel camera. It is extremely tiny, has a decent selection of lenses (especially, the highly desirable 20mm f/1.7), and most importantly, supports capturing of HD Video which looks amazing thanks to its large sensor size that gives professional looking shallow depth of field.

When Amazon dropped the price of the PEN E-PL1 from $599.99 to $549.99, I almost hit the trigger and placed the order. It's a good thing I held on for a few days because Sony just announced their versions of the tiny mirror-less cameras to compete in this ultra-compact category.

There are actually 2 models introduced
   - Sony Alpha NEX-5
   - Sony Alpha NEX-3

Both are identical in features and technical specifications. The only difference between the 2 are:
   - Video quality: NEX-5 can capture 1080i in the AVCHD format, while the NEX-3 is limited to 720p in the MP4 format.
   - Build Quality: NEX-5 has a magnesium alloy body while the NEX-3 has the plastic polycarbonate.
   - Size & Weight: The NEX-5 is slightly smaller & weighs a wee bit lesser than the NEX-3

So what makes the NEX-5 better than the Olympus E-PL1?
For me, the obvious is the sensor size. The NEX-5 has a large APS-C sensor (same sensor size as my current Nikon D200 and about 40% larger than the E-PL1) and its ISO can go up to 12,800 (which leaves my D200 in the dust with its maximum ISO of 1600).

There are only 2 lenses available at the moment (a 16mm f2.8 and a standard zoom lens 18-55mm). Currently, the lenses can only be purchased as part of the kit and Sony has announced that it will release a third lens (18-200) that will retail for around $800.

I plan to pick up NEX-5 with the 18-55mm lens (retail price $699), the moment it is released (end of June) and will give it a spin when I travel to India in July, and will hopefully be able to pick up the 20mm at a later date.

Both NEX-5 and NEX-3 can be currently pre-ordered for Sony Style.

Thursday, April 22, 2010

Geocaching


Geocache Treasure
Originally uploaded by Cajie.
Geocaching is a high-tech treasure hunting game where you use a GPS to hide and seek containers with other participants in the activity. The official website provides more information about this interesting game.
You basically create an account on the website and then search for treasures (or caches) that are hidden around your area.
Each cache is identified by its GPS coordinates. You punch the coordinates in your GPS device and let it guide you to the cache location. Since there is always a margin of error, the GPS will basically take you very close to your target, and then it is up to your skills to actually locate the cache.
The game is very popular in U.S. However, there is not much interest in the game here in Kuwait (where I live). When I created my account and started searching for hidden caches, I could only find a handful hidden caches in Kuwait, and most of them were located on restricted U.S. military areas.
One cache did catch my attention. It was hidden in Jal Al-Zour on top of Mutla Ridge (considered to be the highest point in Kuwait). The ridge is a long hilly area made up of sand and stone that lines up the bay of Kuwait. Since it's a family oriented game, all of us got into our 4x4 and decided to go on an adventure to find the treasure.

What has geocaching got to do with photography, you say? Well, it is an excellent opportunity to go out and explore - which in turn gives you an opportunity to take pictures.

We did manage to locate the cache - and take some nice pictures in the process.

Monday, January 04, 2010

Panoramas and Zooming

Yesterday, I created a panorama of Kuwait City using 44 images and a photo stitching software called Auto-Stitch. I was not very happy with the result, as the limitations of the demo-version of Auto-Stitch combined with my weak laptop configuration meant that the resulting file was only 50% of what I wanted it to be.

I decided to give Photoshop a try - and even though it took couple of hours to process the images, it finally came up with a gigantic 112 mega pixel image.

My next dilemma was how to present this image to others. The file is 22,885 pixels wide and 4,885 pixels long. Obviously, viewing such a large image on a standard 800 x 600 screen would not provide the ideal experience as the user has to scroll up and down to view the details in the image.

There are couple of solutions available for presenting large images to the end user. Zoomify provides a simple application that allows you to feed the application with the large image and it spits out hundreds of tiny images and presents them interactively using a flash-based application. I tried the free version of zoomify with my original (half-sized) image and uploaded it to one my my websites. The result is pretty interesting as you can see it here.

A friend recommended Seadragon - a cool application from Microsoft Live Labs. To implement Seadragon, you first upload the image to any image hosting website (I used my normal Flickr Account) and then give the URL to Seadragon, and it comes up with a interactive version of the image that the user can zoom in and see the details.

I love Seadragon since it's very easy to implement and the result can be embedded directly within your blog/website.

This is my Seadragon implementation of the final image. Click on the (+) and (-) buttons to zoom in and out of the image. You can also use the scroll bar of the mouse for zooming.

Enjoy.


Saturday, January 02, 2010

Panoramas and Stitching.

I've been meaning to create a panorama of Kuwait City for quite some time. But every time I looked out of the window, the weather was either too dusty or too dull or bland - a feature that is part & parcel of this dry & dusty desert place.

Today, the weather was nice and crisp, so I decided to give it a shot. I packed my D200 and the Nikkor 80-200 f2.8 and headed to my favorite destination to capture the Kuwait City skyline.

I shot around 44 pictures and then came home to see how they would look like once stitched together.

I downloaded the demo version of Auto-Stitch. I did face some problems as it was unable to stitch all the images at full resolution due to the limitations of my laptop - so I ended up stitching them at 50% resolution.
I am quite pleased with the initial results of my mega-panorama attempt and will try this with some other projects that I have in mind.

Here's the output from the Auto-Stitch program.

Kuwait Cityscape Panorama - 1

A larger version of the image can be viewed here.

And this is the original output from the Auto-Stitch program. WARNING!. It's a large download so don't click the link if you are on a slow link.

Sunday, November 29, 2009

A visit to Dubai


Burj Al-Arab at Night
Originally uploaded by Cajie.
I've been to Dubai on couple of occasions - but it was always for business purposes and I never really got a chance to see what Dubai has to offer in terms of photography.
This was my first visit with the family and the first thing I did at the airport was rent a car. Having our own car meant that we were free to visit whatever place we felt a fancy for. I also carried my Garmin GPS, which meant that we did not get lost while travelling.
Our trip was short. Just 4 days and 3 nights but we managed to visit quite a few of the Dubai attractions. The cool thing about Dubai is that it is a tourist friendly place - which means photography is considered normal - unlike Kuwait which has a very conservative approach to photography.
Some of the places we managed to visit are:
- The Dubai Mall (one of the largest in the world and home to one of the largest aquarium).
- The Musical water fountains at the Dubai Mall
- Wild Wadi (water theme park)
- Dhow Cruise dinner. A 2 hour trip in a boat with a buffet dinner. Highly recommended.
- Desert Safari. This is not for those who feel dizzy. The wild bumpy ride on the desert dunes made me sick. However, the dinner/entertainment at the end made it worthwhile.
- Zabeel Park. An enormous park for families to just chill out.

What we wanted to do, but missed due to limited time.
- Visit to Hatta mountains.
- The Atlantis (Dolphin bay, water theme park etc.)
- Dubai Marina
- A ride across the Dubai creek on traditional boats
- A ride on the metro.
- Mall of Emirates for skiing.

Which means, we need to visit there again. Here are some more pictures of Dubai.
http://www.flickr.com/photos/cajie/sets/72157622887394930/

Sunday, September 13, 2009

The Perfect Travel Lens.


Nikkor 18-200 VR
Originally uploaded by Cajie.
I purchased this lens few months back because I wanted something light while travelling.

I normally used to travel with the Nikkor 17-55 and the Nikkor 80-200. The problem with this setup is:
a) I lose the focal range from 55 to 80mm
b) The combined weight of both these pro-grade lenses is more than what I lift in the gym during my daily workout.

In this respect, the 18-200 is the perfect travel lens. You get all the range that you would need in a small and light package, and you don't have to worry about changing lenses. The VR (Vibration Reduction) technology works as expected allowing hand-held shots at low shutter speeds of upto 1/15th of a second (a bit lower if you use proper technique).

It has it's disadvantages obviously. It a pretty slow lens with max aperture ranging from f3.5 to f5.6. This means, that when the lens is extended to it's full 200mm, the max aperture is f5.6 which makes it difficult to focus - plus the fact that you need good lighting to get useful pictures.

But even with it's limitations, this is the lens I will be packing for all my future travels.

Until I upgrade to a FX format camera body.

Friday, November 21, 2008

Gulf Run 2008


Beemer
Originally uploaded by Cajie.
The Gulf Run is an event organized by young Kuwaitis who want to practice car racing in a professional and secure environment.

The event is organized at the Bahrain International F1 track and is held annually. This year, k.theKuwait, one of the key organizers of the event, and is also a well-known Kuwaiti blogger gave me an invitation to join them in Bahrain for the event.

To begin with...
a. I've never been to Bahrain.
b. I have no idea why I have never been to Bahrain as it is just 30 minutes flight from Kuwait.
c. I always wanted to visit Bahrain.

So I had no hesitation to jump at the opportunity. k arranged a press pass for me, which means I will have some great vantage points during the actual race.

But before travelling to Bahrain, all the participating cars are prepped up in Kuwait and put on a display. This year, the cars were displayed at the Marina Crescent. I visited Marina today and had a fun time shooting many of the cars on display.

You can see them here

I am looking forward to my trip to Bahrain and hope to get some good shots of the actual race.

Tuesday, October 21, 2008

Photographing Smoke


Smoke Chaos
Originally uploaded by Cajie.
I've been seeing a lot of interesting pictures of smoke on Flickr lately. In fact, there's a group called "artsmoke" that has an amazing collection of images dedicated to smoke.

Because smoke is so dynamic, the possibilities are literally infinite. You can never get the same image twice.

The process of capturing images of smoke is very nicely documented in this how-to guide.

There's also this hands-on kind of guide that I found on the artsmoke flickr group, which is also pretty good.

My first attempt at this form of photography looks passable enough.

Next, I need to do this in a room with absolutely no ventilation.

Friday, September 26, 2008

Nikon F100 - First results


Sharq Marina at 12mm
Originally uploaded by Cajie.
I finally got around to developing the film that I shot with the Nikon F100. The place where I got it developed also gave me a CD of all the developed pictures, which is pretty cool. It's almost like shooting digital.

The thing that I love about the F100 is that my lenses give true focal length as opposed to the D200, which has a small sensor resulting in a 1.5x crop factor. In other words, when I mount a 50mm lens on the F100, it appears as 50mm, while on the D200, the same lens appears as 75mm (50x1.5 crop factor).

This makes ultra-wide angle shooting a bit of a problem on the D200. Take for example the Sigma 12-24mm lens that I own. On the D200, it appears as 18-36mm. That's pretty wide...but when I mount the same lens on the F100, it is actually 12-24mm!!. That super wide.

The crop factor problem has now been solved by Nikon with the newer "FX" format cameras (D3 and D700 are the only 2 cameras from Nikon that currently have a FX sensor). I will eventually upgrade to these camera bodies but not just yet - as the D200 that I own is good enough for the time being.

This picture of the Sharq marina was taken with the Sigma at it's widest focal length of 12mm. It is so wide, that the entire marina can be captured on film. Of course, there is serious perspective distortion but that expected when shooting at such wide focal range.

I was not happy with the colors but I believe that has more to do with the film selection than with the camera itself. I am looking to see if I can get hold of some pro-grade film to do more experiments with film.

Monday, September 22, 2008

Reflections


Reflections
Originally uploaded by Cajie.
I was trying to figure out a way to shoot still objects with some nice reflections. Not 100% reflections using a mirror - just a hint of the object's reflection.

The solution that I came up with is pretty simple (and cheap).
1. Take a kitchen cutting board (I used a white plastic one, but I guess any board will do; even some hard cardboard should be fine)
2. Tape some white A4 paper over it.
3. Wrap it in some plastic; preferably the self-adhesive plastic roll that you find in the bookstores to wrap school books.

The plastic over the white A4 paper gives a nice shiny reflections to your objects.

To take this picture, I placed my DIY reflective board inside a lightbox and had some fun taking pictures of various objects that I found around the house.

Thursday, September 04, 2008

Going back to basics with the Nikon F100.


Nikon F100
Originally uploaded by Cajie.
I thought I'll try a little bit of film photography. Back in the good old days (before switching to digital), I used to own Minolta Dynax 300si. It took some pretty good pictures but lacked the functionality that I have now become accustomed to.
I've always had my eye on the Nikon FM2 (a fully manual camera) and this one, the Nikon F100. After I recently signed up for Paypal & eBay, I thought I'll give it a try to see if I could pick up one at a decent price.
I initially started bidding on a FM2 but quickly discovered that I can get a F100 for almost the same price. I located some mint-condition F100's and started bidding. This was my first experience in eBay bidding and I finally won this item for $274, which is a pretty decent deal.
The item was quickly shipped to my US mailing address and I finally received it 2 days back. The camera itself is in excellent condition and looks almost new. Handling wise, it feels exactly like my D200 and I am looking forward to trying out my Nikkor lens collection on this bad boy. The great thing is that because this is a SLR camera, I do not have to worry about crop factors. The ultra-wide Sigma 12-24 that I have will actually be really ultra-wide. It should be fun trying it out.

Thursday, April 24, 2008

The 18% Grey Card


Healthy Lifestyle
Originally uploaded by Cajie.
With my recent obsession with macro and stock-type photography, I found it a necessity to get hold of a 18% grey card.

What's a 18% grey card, you ask?

Our modern cameras have sophisticated meters that determine what is the "right" amount of light that should be allowed inside the camera's sensor to record an image that is neither under-exposed or over-exposed.

The exposure is determined by 2 elements:
1. Shutter speed.
2. Lens Aperture.

The shutter speed in measured in fractions of a second. Thus, if you see 250 in your view finder, it means that the camera's shutter will be opened 250th of a second (that's very fast, btw).

The lens aperture is the amount of the len's diaphragm that is opened to allow more or less light to enter the camera's chamber. Lens aperture is measured in f stops, and a higher f number indicates a smaller diapghragm (meaning less light is allowed) and a lower f number (meaning the diaphragm is opened more) will allow more light inside. I know it sounds messy - but that's a photographer's life.

So how does the camera determine how much aperture to open and what shutter speed to use?

That's where the camera meter comes in. It is designed to analyze the existing light and select an appropriate aperture/shutter combination that will result in an ideal image.

But the camera's meter is actually a very basic piece of electronics. It simply assumes that the scene being recorded is made of 18% grey and computes the aperture/shutter speed combination based on that assumption.

But why 18% grey?, you may ask...

Good question. When camera manufacturers were designing light meters, they determined that generally, an "average" scene consists of 18% grey. They arrived at this conclusion by shooting wide variety of shots under different lighting combinations.

Of course, not every scene is 18% grey - which is where the camera meter gets fooled. For example, take a picture of a person in front of a white wall, and chances are that the wall will appear grey, instead of white. Now take the same person and place him in front of a black wall and the black wall will not look black at all. In fact, it will appear greyish.

And therein lies the problem. The camera meter wants everything to be grey; but our world is much more complex than that.

Take this picture that I took of a diamond necklace. It was placed on a pristine white A4 paper.

Diamond Necklace

Notice how the background looks greyish. That's because the camera's meter got overwhelmed by the amount of white in the image (while it was expecting an 18% grey).

In normal shooting situations, you can use the EV compensation and rely on your camera's histogram to ensure a reasonably accurate exposure.

But when you are shooting stock-type photography (like the vegetables here), you must get the exact exposure and the whites must look like white.

To do this:

1. Arrange your camera, lights, and subject till you are satisfied with the arrangement.

2. Now place a 18% grey card in front of the subject and take a meter
reading directly off the grey card. Let's assume you are using aperture priority. In this case, the camera's meter will tell you the correct shutter speed to use. If you have seen professional phtographers shooting models, they usually first ask the model to hold a grey card in front of them. Once they are satisfied with the reading, they will remove the grey card and continue with the shooting.

3. You can now remove the grey card and set your camera to manual exposure and set the same f stop that you used in step #2, and enter the shutter speed recommended by the camera.

You can now be sure that your exposures will be perfect.

Enjoy.

Friday, April 18, 2008

Getting the perfect "White Balance"


Kuwait Desert Flower
Originally uploaded by Cajie.
At one point or the other, all of us have come across a situation where our photo just does not feel right. The whites in the image look more like sickly yellow, or magenta or some other color; other than white.

One of the common reasons for this is that your camera was unable to correctly estimate the color temperature. Back in the old days of film, there was no concept of white balance. Professional photographers would load their cameras with specific temperature balanced films. For example, if the photographer knew in advance that his shooting would be done under tungsten lights, then he would load a tungsten balanced film. Similarly if the shooting was done in daylight, then he would load a daylight balanced film. You can understand how complicated this process would be.

Luckily for us, our digital cameras are not film-based but sensor based; and the software in the camera can automatically interpret the data coming from the sensor and correct it to match the lighting conditions. The trick is to figure out the correct lighting conditions.

Digital cameras, to a very large extent, are very good at determining the lighting conditions at the time of taking the picture. They measure the color temperature and the software manipulates the image to match the color temperature.

But they do get confused now and then. This mostly happens when shooting under mixed lighting conditions (a room lit simultaneously by light bulbs and flourescent lights for example) or where the light is changing rapidly (theatre/concerts etc.).

One of the best ways of overcoming white balance confusion is to shoot in RAW and then determine the correct white balance during post processing.

If RAW shooting is not feasible (or you don't want to spend time in post processing), then the next best option is to use a preset white balance. Almost all advanced digital cameras allow you to "compute" an accurate white balance.

To get a proper white balance:

1. Set your camera to measure the white balance. On my Nikon D200, I turn the white balance dial till it says "PRE". On my Casio P&S, the option is available in the menu. Each camera will have it's own way of measuring the white balance.

2. Put a white A4 paper in front of the subject. If you are shooting a person, you can make the person hold the paper.

3. Focus on the paper so that the camera can see only the paper and nothing else. You may have to move in a little closer or zoom in.

4. Click the shutter button and wait for your camera to measure the balance and set the temperature.

5. Now you can start taking pictures with the knowledge that the whites in the pictures will actually look white.

6. Do remember to reset the white balance once you are finished (or if the lighting conditions change) otherwise your camera will be stuck on the last known white balance and subsequent pictures will not come out properly.

Some people deliberately fool the white balance on the camera to get artistic results. But that's another story.

Saturday, April 12, 2008

Getting better at this.


More Colored Pencils
Originally uploaded by Cajie.
After nearly 1 week of experimenting with various lights, white balance, exposure and focusing, I've finally figured out the whole process of macro photography.

I still need a few more things to make an ultimate macro setup.
1. An 18% grey card. Something like this. Having a proper grey card will allow me to do manual exposure; rather than playing with EV shift and histogram checking after each shot. I have to make a trip to the local photo shop to see if they have something similar. Ordering from Amazon will take at least 2 weeks.

2. Daylight balanced light-bulbs. Also known as full-spectrum light bulbs or 5000k (Kelvin) bulbs, these bulbs emit light at 5000k temperature; the same temperature used by flash lights and closely resemble natural light. Having daylight balanced lights would mean I could simply dial in the white balance to 5000k and I would not have to worry about color cast or white balance correction in post processing. I am not sure if such bulbs are available in Kuwait. I checked all the usual suspects (photo shops, sultan center etc.), but haven't found exactly what I am looking for.

Once I have all the necessary equipment, I'll write a detailed review of the whole process of macro-photography of still-objects.

Wednesday, April 09, 2008

Playing with Macro Lens


Extreme DOF
Originally uploaded by Cajie.
After the initial fondling, it was time to start playing with the 105mm macro lens. There are a couple of things worth noting about macro lenses - things that I realized only after trying to shoot with this lens.

1. Variable aperture. This was a shock to me. All my fast lenses (read: fixed aperture lenses) stay fast regardless of zoom or focus distance. So when I open my 80-200 f2.8 wide to it's max aperture of 2.8, it remains 2.8 unless I explicity change it. Not so with this baby. The max aperture is determined by "focus distance", so the closer you focus, the harder it is to achieve the stated f2.8 aperture. It's really a sort of a variable aperture lens.

2. Very painstaking to focus. This is a AF-S (silent wave motor) lens. All my previous experiences with AF-S lenses is that they focus silently and very very fast. This is not true for macro lenses. Because it's focusing range is so great, I found that the lens was hunting like crazy (very silently, of course). There is a focus-limit selector that you can set if you know the focus range is more than 0.5 meters (this limits the focusing from 0.5 meters to infinity but prevents macro focusing). The focus-limit switch speeds up the focusing a bit; but don't expect to whip up this lens and take the "candid moment" shot.

3. Shallow DOF. My 30mm f1.4 has a very shallow depth-of-field but then again, it's not a macro lens and cannot focus very close. This little baby has such a shallow DOF that even a tiny change in distance from camera to subject will throw the focus off. Observe the DOF in this tiny bottle. The DOF is limited only to a few centimeters.

Of course, none of these are limitations. They are basically features attributed to macro lenses. You just have to get adjusted to it.

This is a pretty fanstastic review of this lens.

Monday, April 07, 2008

Micro-Nikkor 105mm VR - First Impression


The VR works
Originally uploaded by Cajie.
When I get hold of a new lens, it is customary for me to plug it into my camera, and take a quick shot of my daughter. That is exactly what I did when I got my new toy, the 105mm Micro-Nikkor.

It is also customary for me to take my first shot with the most extreme settings. This usually means shooting wide open (f2.8 in this case), and since this is my first VR (vibration reduction) lens, I wanted to see if the VR really works. This means shooting at speeds which usually result in blurry images.

This image is taken using Aperture priority, wide open at f3.2 (I will explain why it couldn't be f2.8 in my next post), and at shutter speed of 1/15th of a second. In order to achieve this modest shutter speed, I had to crank up the ISO to 800.

Conclusions: The VR works, and I can safely take hand-held shots at low shutter speeds (as long as the subject is not moving).

Keep in mind that this is a macro lens so taking picture of my daughter is not the most ideal way to test this lens. I will now spend some quality time with a lightbox and some tiny objects trying some real macro shots.

Thursday, March 27, 2008

On Second Thoughts...


Difficult Choice
Originally uploaded by Cajie.
Last week, I decided to upgrade my 50 mm f1.8 to the more professional grade 50 mm f1.4. I even placed the order on Amazon. One week passed, and Amazon still had problems fulfilling the order. This got me thinking...

Why exactly am I paying $300 for a lens that gives me merely a 1/3 wider aperture compared to the lens that I already own?. I am not exactly a professional, and even though I have done a couple of assignments, this is not my full time job. The f1.8 is a fine lens and I felt that the $300 would be better spent in purchasing a lens that I don't own.

Since I have started doing macro work, I felt that spending money on a dedicated macro lens would be more appropriate - and the 105 mm AF-S VR Micro Nikkor seemed like just the ticket. Of course, it's costs a whole lot more than $300; but this lens is legendary, so I had no qualms cancelling my order for the 50mm, and placing the order for the macro lens.

I did check with the local dealer what price they could sell it, but as usual, they are darn expensive. By purchasing from Amazon, I reckon I will save around 65 KD; which is not exactly chump change. I do wish the local dealers realize that internet has made everything global, and such ridiculous markups are no longer acceptable.

Monday, March 24, 2008

Making a DIY lightbox.


Happy Easter
Originally uploaded by Cajie.
I've been meaning to make a cheap light-box, using this tutorial. But everytime I think of starting the project, I stop; because I can't figure out where I will store the darn thing. I don't have the luxury of having many spare rooms in the house.

Couple of months back, I had purchased a small foldable lightbox. This picture of an easter egg is taken using this lightbox; but it's too small for anything other than tiny objects. I need more working space. I have to make one more trip to that photography shop in the city to see if they can offer me something more compact that a big ugly looking box.

Lightboxes are a great way of taking pictures of still objects. Because the light box is completely white, it distributes the light equally so that you don't get the harsh shadows. For example, in this picture, I just placed the lightbox near the window which had some morning light streaming in. No fancy lighting. And the pictures turn out great!.

Saturday, March 22, 2008

Upgrading to 50mm f1.4


Nikkor 50mm f1.8 Front View
Originally uploaded by Cajie.
I've had this 50mm f1.8 prime lens for about 2 years. It's is well-built and one of the best bargain lens from Nikon. Depending on where you buy it from, the price is around $120.

I have never figured out why this lens is sold at such a low price. In the pre-digital era (yes, when people used to shoot with film), this lens was usually bundled as the "kit" lens for most of the Nikon pro-bodies. It may be that over the years, Nikon (and Canon) have figured out how to streamline the manufacturing process of this lens - hence the affordability.

It is a fanstastic portrait lens. On Nikon dSLR bodies (except the newer full-frame D3), the focal length of this lens translates into 75mm (1.5 crop sensor means 50mm x 1.5 = 75mm). This is a good range for taking head shots without any perspective distortion.

It is also an amazing lens for low-light work. The f1.8 means you can work in low-light interiors without a flash and still get useful results.

However, my eye has been on it's more faster cousin. The 50mm f1.4 AFD. For just 1/3rd stop faster focal length, it costs 3 times as much. When I saw Amazon selling it for a $20 discount, I did one of those "impulse" buys and hit the order button.

Once I get hold of the new lens, I will most likely (and grudingly) get rid of this fine piece of Nikon engineering.

Friday, March 21, 2008

Stock Photography


Communion Girl
Originally uploaded by Cajie.
I decided to enroll into istockphoto.com, one of the most popular stock photography site. The idea of stock photography is very simple. You upload your pictures to the site, and then people purchase the pictures at a very low price. The photographer is paid in cents rather than dollars; but because so many people download these pictures, the cents add up.

iStockphoto.com is now owned by Getty Images, which is one of the top stock agencies. Getting into iStockphoto was not as easy as I thought!

Even before you are allowed to upload images, you have to go through an online tutorial, and then answer an exam to ensure you understand their rules of uploading images to the site.

Once you successfully pass the test, you have to load 3 sample images (highest resolution possible) for the istockphoto admins to determine if your photos meet their standards.

This is where I got stuck. At first, I loaded 3 very good images but all got rejected because they did not demonstrate enough variety (they were all pictures of architechture). Next time, the picture was slightly over-exposed, or the focus was not "dead-on", or the picture was over-corrected in photoshop.

The whole process was a very valuable learning experience. Of course, I did manage to give them the 3 "high quality, perfectly exposed, perfectly in focus, diverse" images they were looking for :).

This image of my niece Milica was the last image that was approved by the istockphoto admins and I became an authorized contributor of istockphoto.

Now comes the hard part of actually shooting and uploading "stock-type" images; and hopefully making a few bucks in the process.

Thursday, March 20, 2008

Event Photography.


Family Portrait
Originally uploaded by Cajie.
Up to now, I have stayed away from event photography. I am not really a "people" person (or at least that's how I used to look at myself).

I recently had an opportunity to do 2 events that made me change that attitude.

The first was the communion ceremony of my lovely niece, Milica. I decided to fly to Goa for a quick trip with my D200. To keep my travel kit light, I just packed the 17-55 lens and the SB-800 flash. This lens is really the absolute number one choice for event photography. It provides all the required ranges to capture group photos or an occasional portrait shot. The wide aperture of f2.8 ensures that it handles very well in low-light situation.

I found myself enjoying the whole experience. With the formidable D200 around my neck, everyone simply assumed I am some official photographer, and I could engage anyone for a photo, by simply giving a smile and pointing to my camera to get their acceptance to take the picture.

The second opportunity I had was a birthday party for a close friend's daughter. This was purely an indoor affair; which means the 17-55 + the SB-800 is all that I needed to take great indoor shots.

Wednesday, March 19, 2008

A period of introspection.


KPC In Light
Originally uploaded by Cajie.
Ever since we returned back to Kuwait (after our trip to Toronto in January), I've been having a tough time to get back into photography. The first few weeks were immersed in work and a long business trip to Saudi Arabia. But even after returning back to a normal schedule, I just can't seem to get the inspiration to go out and do some shooting.

This picture of the KPC building was the only picture I have taken during the past 2 months!!

The weather is really great these days (well, most of the time), and it's spring time with lots of flowers springing up everywhere. I need something to make me get out of the house. Perhaps a cool beer, which I miss from my Canada trip?

I did manage to do 2 events. The first was the communion of my niece in India. I flew there just for the occasion, and managed to get some great pictures of the whole ceremony. I am currently doing a project to get these pictures printed through www.blurb.com. I will post about this experience very soon.

The second event was a birthday party that I did last week for the daughter of a very close friend. The D200 paired with the 17-55 f2.8 and the SB-800 speed-light was a fantastic combination. I wish I could post some of the pictures, but I would feel uncomfortable posting pictures of friends without their consent.

Tuesday, January 22, 2008

Slideshows


Slideshows are a pretty neat way of showcasing your photographs, and there are plenty of free tools on the net that can do this for you. I came across a friend's post showcasing a new tool from slide.com that is dead-easy to use; especially if you are using a photo-sharing site like flickr. I just entered my flickr name and it pulled out all my sets. As a test, I just selected my recently shot "Toronto" set, and I was done. It spewed out some code that I just paste into my blog, and the slide show is up and running.

Very cool.

Wednesday, January 02, 2008

The Amazing CN Tower


Toronto At Night
Originally uploaded by Cajie.
We got up today to a bright and clear day after 2 days of heavy snow and dull weather. I thought this would be a great opportunity to visit the Toronto CN tower - one of the tallest structures in the world. The clear weather meant I would have some good photo opportunities.

We reached the tower at around 11:00 AM. It was indeed a great day to visit the place as the view was simply stunning. The only problem was that the temperature was -9 degrees and we literally turned to ice as we walked up to the tower to purchase our tickets.

Due to the cold weather, there were not much people around, so we managed to get an elevator fairly quickly - and very soon, we were on top of Toronto. I was not interested in anything except clicking away at the amazing view.

The thing on my mind was - if this is such a great view during daytime, how good will it be at night? and more importantly, how the heck can I keep the kids for 6 whole hours on top of the tower so that I could get some night-time shots of Toronto city?

I took the family to lunch in the Tower restaurant where I sipped on a cool cocktail while enjoying the panaromic view of Toronto City. Then I got the kids involved in some trick photography one guy was doing by taking their pictures on a green background and then photoshopping it to make the kids look as though they were climbing the CN Tower like King Kong.

Finally, it was sunset and the city started turning on the lights. As you can see from the picture, the view was indeed stunning.

Monday, December 31, 2007

A walk on the wild side.


If looks could Kill
Originally uploaded by Cajie.
I decided to take the family to the Toronto Zoo. Probably not a very good idea to visit a zoo during a time where the outside temperature is zero degrees.

It was freezing, with snow everywhere. Most of the animals were either hibernating or hiding in their warm homes. But there was still plenty to see and do.

The kids had a good time though the little one got tired with all the walking and the freezing cold; and I ended up carrying her most of the time.

The high point for me was this lion exhibit. It's designed in such a way that you get to see the lion face to face with only a wall separating the lion and a tasty snack. This particular lioness was looking the other way and I waited around 15 minutes near the exhibit hoping he will turn his face. Finally he did, and I managed to to get this shot.

Here are some more pictures that I took at the zoo.

Zero Degrees


First Steps
Originally uploaded by Cajie.
We travelled to Toronto, Canada - and my kids went berserk with all the snow around. Erika (my 4-year old daughter) had never seen real snow before but you wouldn't know that seeing her embrace it like a long lost friend.

I took them near the Toronto harbor area which has an outdoor skating rink. The temperature was zero degrees celsius, which for everyone (except for me and my wife) seemed to be nice and balmy.

I rented out some skates for both the kids - Shawn can do some basic skating (He learned at the Kuwait skating rink), but it was first time for Erika.

As the sun went down, I had a very hard time convincing Erika to get out of the rink.

Sunday, December 23, 2007

Merry Christmas


Christmas Crib
Originally uploaded by Cajie.
Last night, I happened to be at the Catholic church just as they were unveiling this year's christmas crib. Luckily, I had my camera bag in the car.

When the organizers saw my camera gear, they immediately requested that I do an "official" photograph of their creation. This meant that I needed a tripod, which I always keep in the car.

The funny thing is that everyone who wanted to take a picture with their camera phone or point & shoot gave me a wide and respectful berth; assuming I am some official photographer - which, in this case, I guess I was.

So I ended up doing this "official" photo of the 2007 christmas crib. I also ended up taking some pictures of the organizing committee.

Merry Christmas & a Happy New Year 2008.

Wednesday, December 19, 2007

Nikkor 17-55 f2.8, First test shots.


Souq Sharq Mall
Originally uploaded by Cajie.
I got my first chance today to try out the new 17-55 lens. It looks and feels great and allows me to take pictures that were not possible before.

This picture of a local mall is taken wide open at 17mm at f4 and ISO 640 giving me sufficient hand-held shutter speed of 1/50th of a second.

What is more interesting for me is that at this ultra-wide angle, the distortion (though it exists) is minimal and well-controlled.

This is going to be the lens that stays on my camera body 95% of the time from now on.

Tuesday, December 18, 2007

The beast has arrived.


1755Lens-Black
Originally uploaded by goan_in_q8.
I have been toying with the idea of purchasing this lens for a long time, but the price was just beyond my reach. I just could not justify paying $1400 for a lens with a range of 17-55mm, when my $300 18-70mm DX lens was giving great results, plus extra range upto 70mm.

But what sets this lens apart from the 18-70mm lens is that this is a fixed focal lens - just like my 80-200 f2.8. It has a constant maximum aperture of f2.8, which means that regardless of what focal length I choose, the widest aperture is guaranteed to remain at f2.8. This is great for low light photography.

I was finally convinced to pick this thing when I saw Amazon offering it for $1200. Though not cheap, I decided to throw caution to the wind and closed my eyes and hit the order button.

The first impression I got when I held this lens in my hand is that I better hit the gym. The thing is built like a tank and carrying this thing around for a long time is definitely going to test my frail muscles.

I have not yet got a chance to test the image quality of this lens, but I am looking forward to doing so in the next few days.

Friday, December 07, 2007

Farewell to a trusty tool.


DX1870
Originally uploaded by goan_in_q8.
I just sold this lens, as I ordered the Nikkor 17-55 f2.8 lens, and expecting to receive it in the next few days.

The 18-70 served me well during the 2 year that I owned it - first on my D70, and then for the past few months, on the D200. It is fast, wide, light in weight and offers a good zoom range that is ideal while travelling, or general walkabouts.

As of now, more than 90% of the work posted on my flickr account is taken with this lens. I had come to learn it's quirks and how to work around them. For e.g., it distorts heavily at the wide angle. In this photo, the nearest lamp post looks like it is curved instead of appearing straight. Nothing much can be done about it because that the nature of lower-end glass.

The 17-55, on the other hand, is a professional grade lens, and hence distortion should be minimal. I say "should", because I have not yet tried this lens, nor held it in my hands. I have simply ordered it based on the recommendations of fellow photographers.

Some people asked me why I would give up the advantage of the wider zoom range (18-70), and pay 4 times the price for a lesser zoom range (17-55). Well, it's true that I will be crippled because I do not have anything from 55mm to 80mm (My 80-200 f2.8 does duties from 80 to 200mm).

However, it's not just about zoom range. For e.g., for half the price, I could have picked up the 18-200 VR wonder lens. But what sets the 17-55 apart from all these amateur lenses is the constant f2.8 aperture for the entire zoom range. That means, whether I set the lens at 17mm or 55mm, I can keep the aperture at 2.8, which in turn, means I can shoot great photos in very low-light conditions.

At least, that's the theory.

And my 1300 dollars are riding on that theory.